
You've added your products to your store, but now you need to customize them with logo options — and they each need more than one. No problem! In this article, we'll go over how to add a dropdown to the products so the customer can select the logos they want!
Skip ahead to Adding the Logo Option to the Product if you have an existing global logo option that you want to add to a product.
Add the product to the store
The first step is adding the product to the store. Click here for a how-to on adding Verified Products to a store.
Creating a Global Logo Option
Before an option for multiple logos can be added to a product, it must first be created as a Global Option. Global Options are great because they can be added to any product in any store once it has been created!
Step 1: Click on the "Sizes & options" tab.
Step 2: To create a new option, click "manage global options".
Pro Tip: Once you create a Global Option, it will be available on any product in any store in your account!
Step 3: Click the green "Add New Option" button.
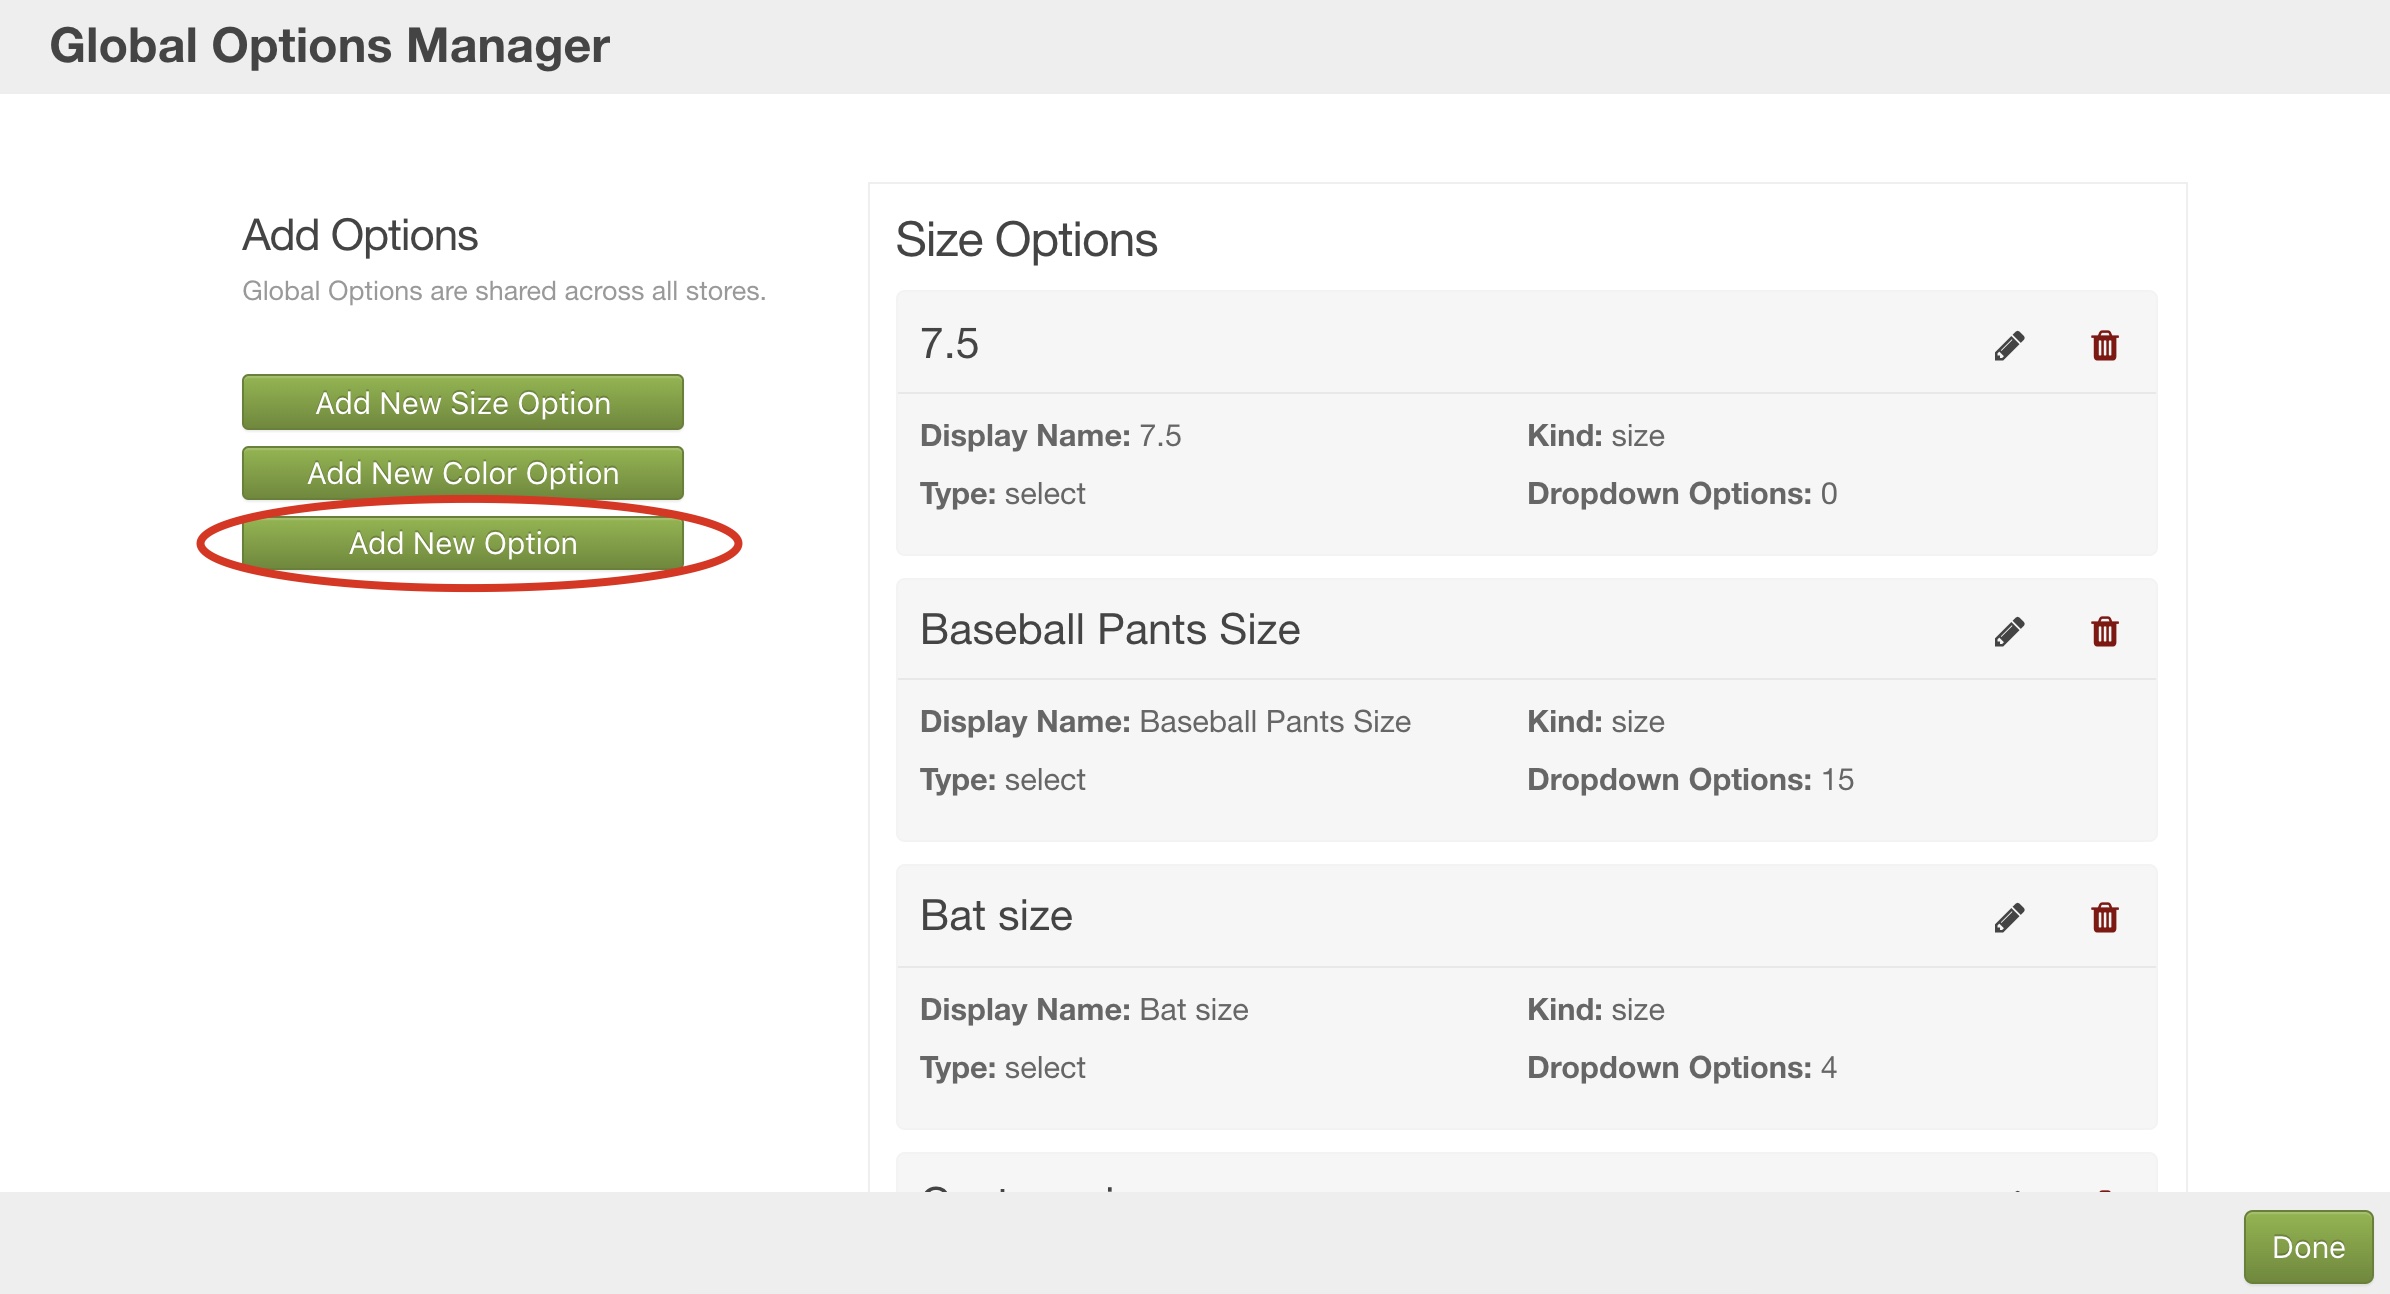
Step 4: An "Add New Option" window will open.
Step 5: Type in all of the logo details:
- Internal Name: The name that will appear when you search for the option.
- Display Name: The name the customer will see on the store.
- Input Type: Select "Choice".
- Kind: Select "Logo".
Step 6: Add a logo choice by typing in a logo name and hitting the return (enter) key on your keyboard. The logo name will appear in a grayed-out box above the "Drop-down Options" field
Step 7: Continue this process until all the logo options' names are added.
Step 8: Options can be deleted by clicking the gray X.
Step 9: Click the black checkmark in the upper right corner to save changes.
Step 10: Click the green "Done" button to exit the "Global Options Manager" window.
Adding the Logo Option to the Product
Now that we've created our Global Option, it can be added to the product.
Step 1: Click "+ Add Option" in the bottom left corner.
Step 2: This will open up the "Select an Option" dropdown.
Step 3: Type in the logo option's name and select.

Step 4: Once selected, the option will appear.
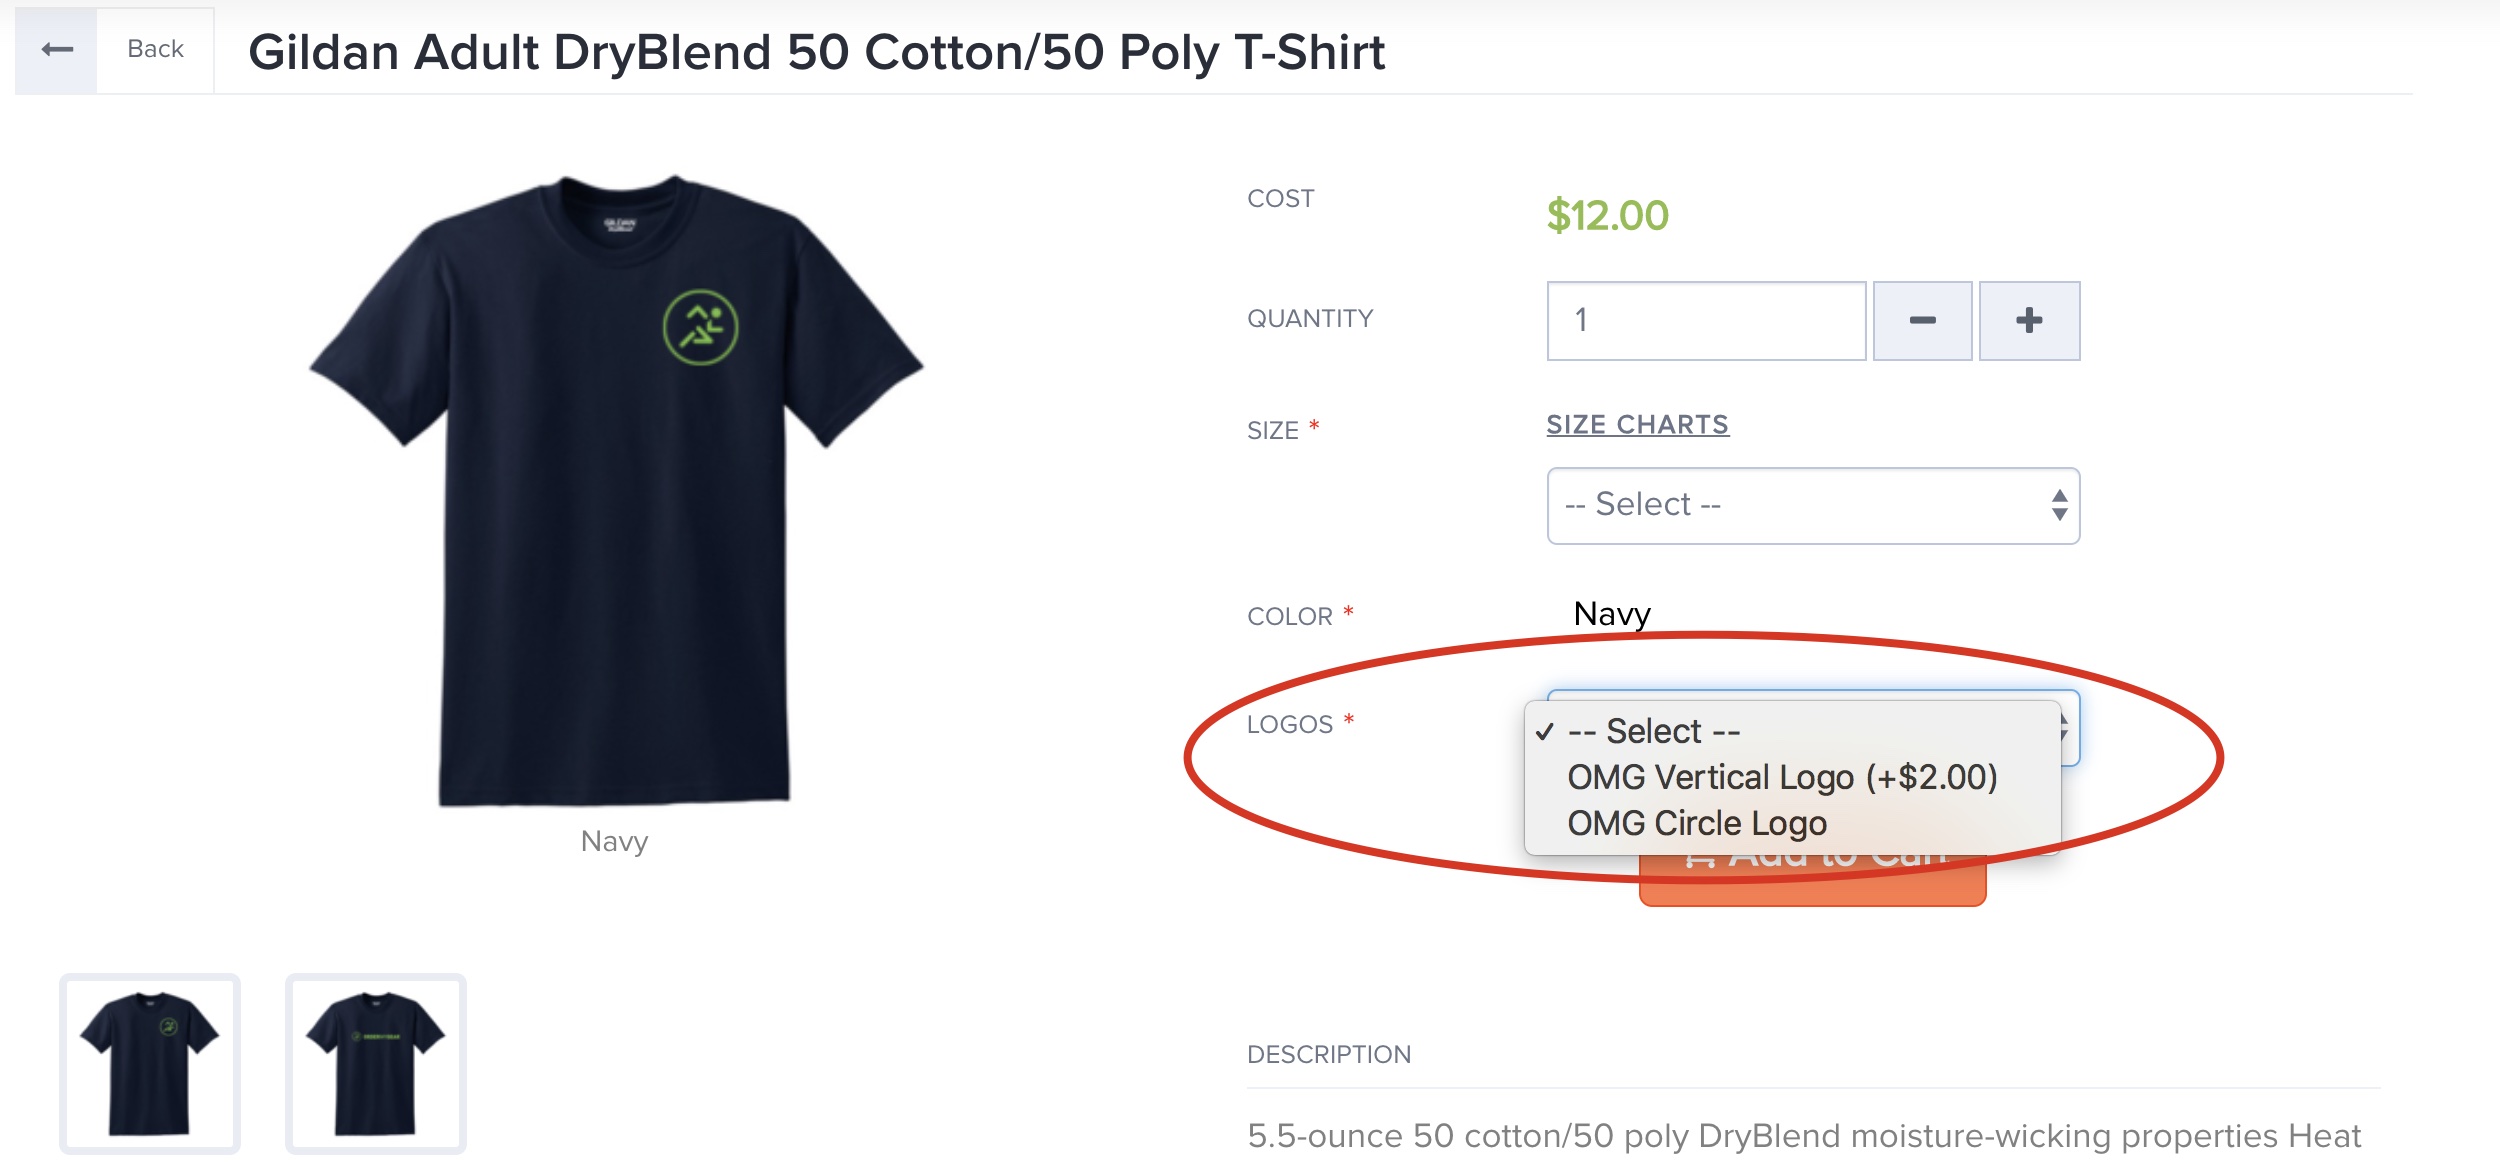
Step 5: Click the "Select Values" dropdown and select the desired options.
Step 6: Check the "Make Required?" checkbox if this option is mandatory. When this is selected, the customer will not be able to add the product without choosing one of the provided options.
Step 7: Logo upcharges can be added via the "Upcharges" section.
Step 8: Click the green checkmark located in the upper right corner to save.
Step 9: The logo option is now added to the product!
Step 10: Click the ![]() icon to adjust upcharges, make the option mandatory, or add extra price edits.
icon to adjust upcharges, make the option mandatory, or add extra price edits.

Step 11: Green means go, Gray means no. Clicking a green option will turn it gray and remove it from the logo dropdown.

Step 12: On the storefront, the customer will be able to select their desired logo.
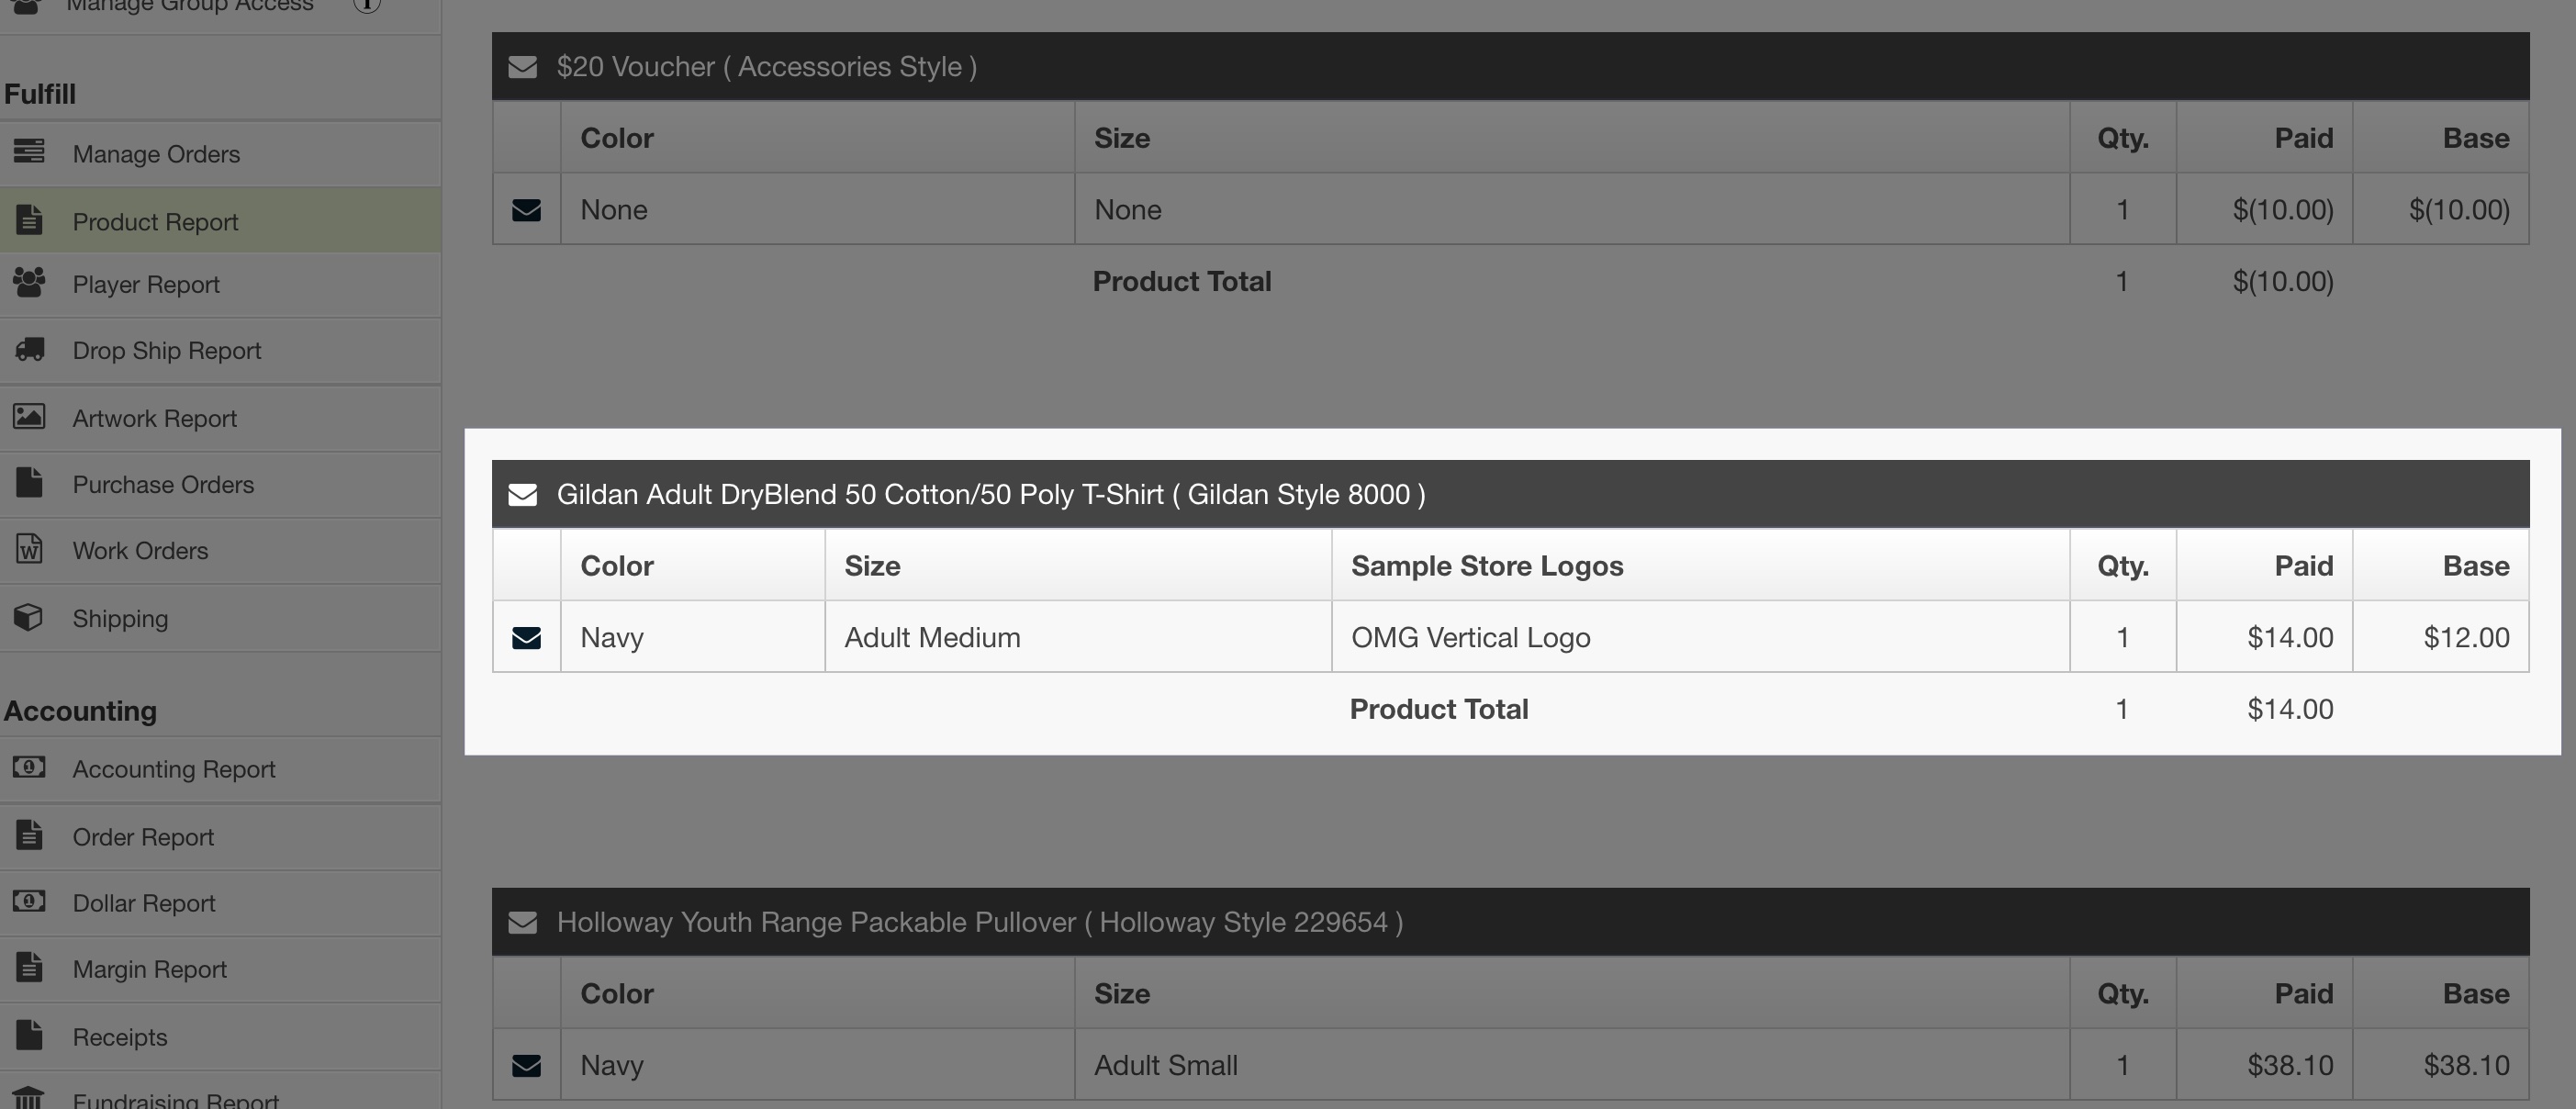
Step 13: The store reporting will also show the selected logo!
When offering multiple logo options it is also best practice to display those different options. Learn how to easily copy a product image here!
Comments
0 comments
Article is closed for comments.